NOMAD - Producing the Cinematic
- p15221234
- May 16, 2018
- 4 min read
Updated: May 22, 2018
In this blog post I will talk about how I created cinematic sequence including how I edited the final video and setting up the camera system in UE4. Before I started making the level, I had ideas as to how the camera would move in the final cinematic and the sorts of camera angles I would be using. I opted for a lot of dutch angles and one-point perspective as I wanted to reinforce the idea that this was taking place in zero gravity. I also wanted to use slow camera shots to add a feeling of suspense.
WORK IN UE4
While I had never made a cinematic before in UE4, I found the animation and cinematography tools to be quite intuitive and I liked the dynamic nature of the level sequence. The tutorials provided by the Unreal Engine developers were very useful and I referred to them a lot during the process. I had done some cinematic work before in Blender before I started to do games so the idea of keyframing cameras and keyframe interpolation was already familiar. To start creating a cinematic, I simply had to create a master level sequence, in which the individual camera shots would be contained:

From this editor, I could cut and add different tracks to the timeline, and preview it in real-time as show here (notice the playback controls on the viewport):

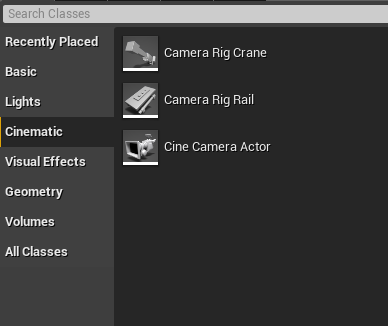
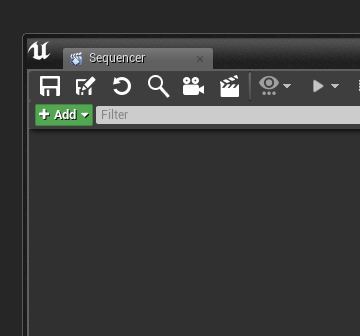
To begin I added a cine camera actor to the scene which is found in the modes tab in the editor. This and its various features are animated during the cinematic. I then created a new shot track which can be accessed by clicking on the green 'ADD' box on the editor window:
This gave me this window in which I could specify the length of the shot as well as the current camera cut (which didn't need changing). From here, all the keyframing and animating for the shot takes place which is relatively simple to do:

The current parameters that can be animated are listed on the left with the current values listed as well. The keyframes are marked with a little symbol along the timeline, with the keyframe interpolation marked with respective symbols:

If there is component that needs to be animated while the shot takes place (i.e. a light turning on or a door opening etc.), this can be found in the details panel on the right of the main editor window:

I created simple camera motion by keyframing the initial camera transformation at frame 0, scrolling to the desired frame and setting another keyframe for the end camera transformation; in this case frame 649. For more detailed editing, the individual animation curves can be edited for custom interpolation.

An audio track can be added to the sequencer to help synchronise the camera shots and editing, and in this case I added the score for my cinematic. This was crucial to do as I had planned for my camera cuts to take place on key sounds inside the soundtrack:

I pretty much did this for the rest of the cinematic shots, syncing the cuts and motions to the music and animating the lights to turn on and off on cue. After polishing up the shots and making sure everything is synced, I exported it to a .avi file using the following settings:

EDITING IN BLENDER
After exporting the movie file from UE4, I took it into Blender to add titles. I had decided since the start of the project I wanted bold, striking titles like in TV shows such as Mr Robot, Utopia and Preacher. In the song I produced for the cinematic, I created distorted industrial stabs as a way to trigger the different titles. Achieving this was quite simple in Blender, by adding keyframes to toggle the visibility of certain titles. As you can see, I had text objects stacked on top of each other, with the camera positioned directly above facing down. Here is a screenshot of my setup:

Here is the dopesheet for the animation; even though it looks super complicated, it was fairly simple to do as I can just keyframe inside the viewport without having to edit graphs or whatnot. Like in UE4 sequencer, the individual dots represent keyframed values along the timeline:

All of the text objects have a shadeless white material applied to them so that when it comes to adding the titles to video, I can have the video playing in the white areas of the text. Here is the video sequence strip with the scene strip and audio overlaid. The scene strip essentially captures what's in the 3D camera's view, renders it alongside the frame of the video and adds it to the video sequence. The audio strip is used to add audio to the current video sequence and gets added when the movie is rendered out:

LOGO DISTORTION
To create the logo distortion, I created the logo in 3D and used some compositing tricks to generate a glitched effect. Yet again, I animated the parameters because I wanted variety in the glitching and I had to match the sound of the music. I basically used procedural generated cellular noise, which allowed me to get a distorted square effect. I used the cell noise to control the pixel displacement and I added a colour ramp node to essentially scan through and mask the areas which are meant to be black. I then used mix nodes to switch between the original logo and the distorted one for variation, and also between the colour distorted version. Here are the compositing nodes and animation curves for the different parameters:


This logo sequence was finally exported to an image sequence which was then loaded into the main title sequence file. After that, I rendered out the finished video sequence to a PNG image sequence at 2x HD resolution, which took around an hour to complete. I did this so that I could replace any segments of the video without having to render the whole sequence out twice. I then took the whole folder of the rendered image sequence and rendered it into a .mp4 file in a separate file.
Overall, I thoroughly enjoyed producing the cinematic as it taught me new skills with the UE4 sequencer that I could use for future projects. Furthermore, it allowed me to explore my own style of film-making and cinematography as well as teaching me about basic animation which I could explore further. Here is the finished cinematic, enjoy :D


Comments